Table of Contents:
Understanding Ironfish GPU Mining
Ironfish GPU mining is a process where you use your computer's graphics processing unit (GPU) to mine Ironfish coins. This method is popular because GPUs are more efficient than central processing units (CPUs) for the complex calculations required in mining.
In the Ironfish network, miners play a crucial role. They generate new blocks and validate transactions. This ensures the network remains decentralized and secure. By participating in mining, you contribute to the stability and growth of the Ironfish blockchain.
Get $500 free Bitcoin mining for a free testing phase:
- Real daily rewards
- 1 full month of testing
- No strings attached
If you choose to buy after testing, you can keep your mining rewards and receive up to 20% bonus on top.
Unlike some other cryptocurrencies, Ironfish mining is optimized for GPUs. This means you need a GPU with at least 5 GB of memory to mine effectively. CPUs, FPGAs, and ASICs are not suitable for Ironfish mining.
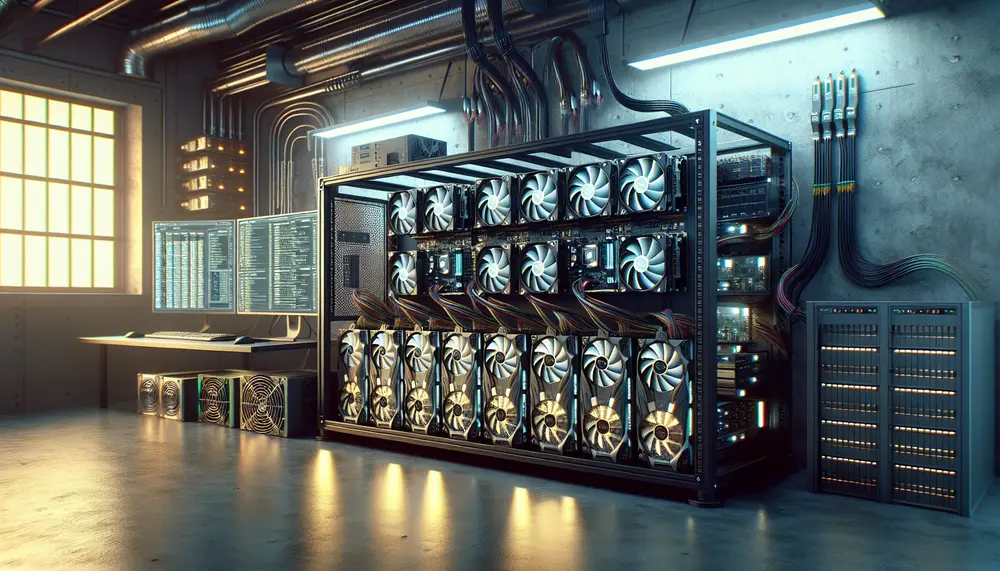
To start mining, you will need to set up a mining rig with the appropriate hardware and software. You will also need a wallet to receive your mining rewards. The process might seem complex at first, but with the right guidance, you can start mining Ironfish coins efficiently.
In the following sections, we will guide you through the steps to set up your mining operation, choose the right software, and connect to a mining pool. Whether you are a beginner or an experienced miner, this guide will help you navigate the world of Ironfish GPU mining.
Why Choose Ironfish for GPU Mining?
Ironfish offers several compelling reasons to choose it for GPU mining. Here are some key benefits:
- Decentralization: Ironfish promotes a decentralized network, reducing the risk of centralization. This ensures the network remains secure and fair for all participants.
- Privacy: Ironfish uses advanced cryptographic techniques to ensure transaction privacy. This makes it an attractive option for those who value confidentiality in their transactions.
- Efficiency: Ironfish is optimized for GPU mining, making it more efficient than many other cryptocurrencies. This means you can achieve higher mining rewards with the same hardware.
- Community Support: The Ironfish community is active and supportive. Whether you are a beginner or an experienced miner, you can find help and resources in the community forums and Discord channels.
- Scalability: Ironfish is designed to scale efficiently, ensuring that the network can handle increased usage without compromising performance.
Choosing Ironfish for GPU mining not only offers technical advantages but also aligns you with a project focused on privacy and decentralization. This makes it a strong contender in the cryptocurrency mining space.
Basic Requirements for Ironfish GPU Mining
Before you start mining Ironfish, you need to ensure you have the necessary hardware and software. Here are the basic requirements:
- GPU: A graphics card with at least 5 GB of memory is essential. Popular choices include NVIDIA and AMD GPUs.
- Operating System: Ironfish mining software is compatible with Windows and Linux. Ensure your OS is up-to-date for optimal performance.
- Driver Software: Install the latest drivers for your GPU. This ensures compatibility and improves mining efficiency.
- Internet Connection: A stable and fast internet connection is crucial. Mining requires constant communication with the Ironfish network.
- Power Supply: Mining can be power-intensive. Ensure your power supply unit (PSU) can handle the load of your GPU and other components.
- Cooling System: GPUs generate a lot of heat during mining. Invest in a good cooling system to prevent overheating and maintain performance.
Once you have the necessary hardware and software, you can proceed to set up your Ironfish wallet and mining software. These steps are crucial to start mining effectively and securely.
Setting Up Your Ironfish Wallet
Before you can start mining Ironfish, you need a wallet to store your mining rewards. Here’s a step-by-step guide to setting up your Ironfish wallet:
- Download the Ironfish Wallet: Visit the official Ironfish website and download the Ironfish Wallet application. Ensure you download it from a trusted source to avoid security risks.
- Install the Wallet: Follow the installation instructions provided on the website. The process is straightforward and should only take a few minutes.
- Create a New Wallet: Open the Ironfish Wallet application and select the option to create a new wallet. You will be prompted to set a strong password. Make sure to store this password securely.
- Backup Your Wallet: The wallet will generate a seed phrase, which is a series of words that can be used to recover your wallet. Write down this seed phrase and store it in a safe place. Do not share it with anyone.
- Get Your Wallet Address: Once your wallet is set up, you will receive a unique wallet address. This address is where your mining rewards will be sent. Copy this address as you will need it later when configuring your mining software.
With your Ironfish wallet set up, you are now ready to configure your mining software and start mining. The wallet ensures that your mining rewards are securely stored and easily accessible.
Selecting the Right Mining Software
Choosing the right mining software is crucial for efficient Ironfish GPU mining. Here are some popular options and what you need to consider:
- Rigel: Rigel is known for its user-friendly interface and robust performance. It supports a wide range of GPUs and offers detailed monitoring features.
- lolMiner: lolMiner is another popular choice, especially for AMD GPUs. It provides high performance and is regularly updated to support the latest mining algorithms.
- SRBMiner: SRBMiner is versatile and supports both AMD and NVIDIA GPUs. It offers advanced features like auto-tuning and dual mining capabilities.
When selecting mining software, consider the following factors:
- Compatibility: Ensure the software is compatible with your GPU and operating system.
- Performance: Look for software that offers high hash rates and efficient power usage.
- Ease of Use: Choose software with a user-friendly interface, especially if you are a beginner.
- Support and Updates: Opt for software that is regularly updated and has good community or developer support.
Once you have selected the right mining software, you can proceed to configure it for Ironfish mining. This involves setting up your wallet address, connecting to a mining pool, and optimizing your settings for the best performance.
Configuring Your Mining Software
After selecting the right mining software, the next step is to configure it for Ironfish mining. Proper configuration ensures that your mining operation runs smoothly and efficiently. Follow these steps to set up your mining software:
- Download and Install: Download the mining software from the official website and install it on your mining rig. Ensure you follow the installation instructions provided by the software developer.
- Edit Configuration File: Most mining software comes with a configuration file that you need to edit. Open this file in a text editor and input the necessary details:
- Wallet Address: Enter your Ironfish wallet address where your mining rewards will be sent.
- Mining Pool URL: If you are joining a mining pool, input the pool's URL. For example, f2pool's URLs are:
- North America:
iron-na.f2pool.com:1500orstratum+ssl://ironssl-na.f2pool.com:1510 - Europe:
iron-euro.f2pool.com:1500orstratum+ssl://ironssl-euro.f2pool.com:1510 - Asia:
iron-asia.f2pool.com:1500orstratum+ssl://ironssl-asia.f2pool.com:1510
- North America:
- Worker Name: Assign a unique name to your mining rig. This helps you identify it in the mining pool dashboard.
- Save and Close: After editing the configuration file, save your changes and close the text editor.
- Run the Software: Launch the mining software. It will start connecting to the Ironfish network and begin mining. Monitor the output to ensure everything is running correctly.
Proper configuration is key to maximizing your mining efficiency. Make sure to double-check all settings and keep your software updated to benefit from the latest features and improvements.
Mining Pools vs. Solo Mining
When it comes to Ironfish GPU mining, you have two main options: joining a mining pool or mining solo. Each method has its pros and cons, and the best choice depends on your specific circumstances.
Mining Pools
Mining pools are groups of miners who combine their computational power to increase their chances of solving blocks. Here are some advantages and disadvantages of mining pools:
- Advantages:
- Steady Income: Pools distribute rewards among all participants, providing a more consistent income stream.
- Lower Variance: Pool mining reduces the variance in reward payouts, making earnings more predictable.
- Support and Resources: Many pools offer additional services like customer support and performance monitoring tools.
- Disadvantages:
- Fees: Pools usually charge a fee (e.g., 1%) for their services, which reduces your overall earnings.
- Dependence: You rely on the pool's infrastructure and policies, which may change over time.
Solo Mining
Solo mining means you mine independently without joining a pool. Here are the advantages and disadvantages of solo mining:
- Advantages:
- No Fees: You keep all the rewards you earn, as there are no pool fees.
- Full Control: You have complete control over your mining operation and can make changes as needed.
- Disadvantages:
- High Variance: Rewards can be unpredictable, as you may go long periods without finding a block.
- Resource Intensive: Solo mining requires more resources, including running your own node and maintaining your hardware.
In summary, mining pools offer a more stable and predictable income, making them ideal for beginners and those with limited resources. Solo mining, on the other hand, can be more rewarding but comes with higher risks and resource requirements. Choose the method that best aligns with your goals and capabilities.
Connecting to a Mining Pool
Joining a mining pool can help you achieve more consistent earnings. Here’s how to connect to a mining pool for Ironfish GPU mining:
- Choose a Mining Pool: Select a reputable mining pool that supports Ironfish. Popular options include f2pool, which offers multiple server locations for better connectivity.
- Create an Account: Sign up for an account on the mining pool's website. You may need to create a subaccount for each mining rig you plan to use.
- Obtain Pool URL: Get the pool URL from the mining pool's documentation. For example, f2pool provides the following URLs:
- North America:
iron-na.f2pool.com:1500orstratum+ssl://ironssl-na.f2pool.com:1510 - Europe:
iron-euro.f2pool.com:1500orstratum+ssl://ironssl-euro.f2pool.com:1510 - Asia:
iron-asia.f2pool.com:1500orstratum+ssl://ironssl-asia.f2pool.com:1510
- North America:
- Configure Mining Software: Open your mining software's configuration file and input the following details:
- Save and Start Mining: Save the configuration file and start your mining software. It will connect to the mining pool and begin mining Ironfish.
By following these steps, you can easily connect to a mining pool and start earning rewards. Mining pools provide a more stable income and additional support, making them a great choice for both beginners and experienced miners.
Monitoring Your Mining Performance
Once your mining operation is up and running, it's important to monitor its performance to ensure optimal efficiency and profitability. Here are some key aspects to keep an eye on:
- Hash Rate: The hash rate indicates the speed at which your GPU is solving cryptographic puzzles. A higher hash rate means more chances of earning rewards. Most mining software displays the current hash rate on the main dashboard.
- Temperature: GPUs can get very hot during mining. Monitoring the temperature helps prevent overheating, which can damage your hardware. Aim to keep your GPU temperature below 80°C.
- Power Consumption: Mining is power-intensive. Keep track of your power usage to manage costs and ensure your power supply unit (PSU) can handle the load.
- Mining Pool Dashboard: If you are using a mining pool, log in to the pool's dashboard to monitor your performance. You can see metrics like shares submitted, rewards earned, and your overall contribution to the pool.
- Logs and Alerts: Enable logging in your mining software to keep a record of its performance. Set up alerts for issues like connection drops or hardware failures, so you can address them promptly.
Regular monitoring helps you identify and resolve issues quickly, ensuring your mining operation remains efficient and profitable. Use the tools and features provided by your mining software and pool to stay informed about your performance.
Common Troubleshooting Tips
Even with the best setup, you may encounter issues while mining Ironfish. Here are some common troubleshooting tips to help you resolve problems quickly:
- Low Hash Rate: If your hash rate is lower than expected, check the following:
- Ensure your GPU drivers are up-to-date.
- Verify that your mining software is configured correctly.
- Check for any background processes that might be using GPU resources.
- Overheating: If your GPU is overheating, consider these solutions:
- Improve airflow by adding more fans or repositioning your rig.
- Clean the GPU and other components to remove dust buildup.
- Reduce the GPU's power limit or clock speed to lower heat output.
- Connection Issues: If your mining software is having trouble connecting to the pool, try the following:
- Check your internet connection and ensure it is stable.
- Verify that the pool URL and port number are correct.
- Restart your router and mining software.
- Frequent Crashes: If your mining software crashes frequently, consider these steps:
- Update to the latest version of the mining software.
- Check for any hardware issues, such as faulty RAM or PSU.
- Monitor system logs to identify any specific errors or warnings.
- Incorrect Payouts: If you notice discrepancies in your payouts, do the following:
- Ensure your wallet address is correctly configured in the mining software.
- Check the mining pool's dashboard for detailed payout information.
- Contact the mining pool's support team for assistance.
By following these troubleshooting tips, you can quickly address common issues and maintain a smooth and efficient mining operation. Regular maintenance and monitoring are key to long-term success in Ironfish GPU mining.
Frequently Asked Questions (FAQ)
Here are some common questions and answers about Ironfish GPU mining:
- What is Ironfish?
Ironfish is a privacy-focused cryptocurrency that uses advanced cryptographic techniques to ensure transaction confidentiality. It is optimized for GPU mining, making it accessible to a wide range of miners.
- What hardware do I need to mine Ironfish?
You need a GPU with at least 5 GB of memory. Popular choices include NVIDIA and AMD GPUs. Ensure your system has a stable internet connection, sufficient power supply, and proper cooling.
- How do I set up my Ironfish wallet?
Download the Ironfish Wallet application from the official website, install it, create a new wallet, and back up your seed phrase. Your wallet address will be used to receive mining rewards.
- Which mining software should I use?
Popular mining software for Ironfish includes Rigel, lolMiner, and SRBMiner. Choose software that is compatible with your GPU and offers the features you need.
- What is the difference between mining pools and solo mining?
Mining pools combine the computational power of multiple miners, providing more consistent rewards. Solo mining means mining independently, which can be more rewarding but comes with higher risks and resource requirements.
- How do I connect to a mining pool?
Sign up for an account on the mining pool's website, obtain the pool URL, and configure your mining software with your wallet address and the pool's details. Start your mining software to connect to the pool.
- How can I monitor my mining performance?
Use the monitoring features provided by your mining software and pool dashboard. Keep an eye on metrics like hash rate, temperature, power consumption, and rewards.
- What should I do if I encounter issues while mining?
Refer to common troubleshooting tips such as updating drivers, improving cooling, checking internet connection, and verifying configuration settings. Regular maintenance and monitoring can help prevent issues.
If you have additional questions, consider joining the Ironfish community forums or Discord channels for further support and resources.
Conclusion: Start Your Ironfish GPU Mining Journey
Ironfish GPU mining offers an exciting opportunity to participate in a privacy-focused cryptocurrency network. By following this comprehensive guide, you can set up your mining operation, choose the right software, and connect to a mining pool for consistent rewards.
Here’s a quick recap of the steps to get started:
- Ensure you have the necessary hardware, including a GPU with at least 5 GB of memory.
- Set up your Ironfish wallet to receive mining rewards securely.
- Select and configure the right mining software for your GPU and operating system.
- Decide whether to join a mining pool or mine solo, based on your goals and resources.
- Monitor your mining performance to ensure optimal efficiency and profitability.
- Troubleshoot common issues to maintain a smooth mining operation.
Mining Ironfish can be both rewarding and educational. It allows you to contribute to a decentralized network while earning cryptocurrency. Whether you are a beginner or an experienced miner, the Ironfish community is there to support you along the way.
Start your Ironfish GPU mining journey today and become part of a growing network that values privacy and decentralization. Happy mining!
Ironfish GPU Mining FAQ
What is Ironfish?
Ironfish is a privacy-focused cryptocurrency that uses advanced cryptographic techniques to ensure transaction confidentiality. It is optimized for GPU mining, making it accessible to a wide range of miners.
What hardware do I need to mine Ironfish?
You need a GPU with at least 5 GB of memory. Popular choices include NVIDIA and AMD GPUs. Ensure your system has a stable internet connection, sufficient power supply, and proper cooling.
How do I set up my Ironfish wallet?
Download the Ironfish Wallet application from the official website, install it, create a new wallet, and back up your seed phrase. Your wallet address will be used to receive mining rewards.
Which mining software should I use?
Popular mining software for Ironfish includes Rigel, lolMiner, and SRBMiner. Choose software that is compatible with your GPU and offers the features you need.
What is the difference between mining pools and solo mining?
Mining pools combine the computational power of multiple miners, providing more consistent rewards. Solo mining means mining independently, which can be more rewarding but comes with higher risks and resource requirements.